Tag Archives: Conditioning

The Best Online Baseball Training Program

There are a lot of resources online that discuss baseball training programs.  Some websites are good, but most are poorly laid out, lack direction for athletes seeking help, and not very user-friendly.  Sometimes, there is so much information, you just do not know where to begin and those sites can leave you more confused than when you first began reading.

So, to save you time, effort, and money, we are just going to tell you what the best baseball training program available is.  And the answer is:  there isn’t one.  Somehow, you saw this coming.

There is no one-size-fits-all training program for every ballplayer.  Compared to other sports, baseball players have unique demands and needs that some regular ol’ training program just cannot address.  So, you first need to find a baseball-specific program that addresses the unilateral nature of the sport, overhead demands, rotational demands, baseball-specific conditioning, and proper rest and recovery protocols.  Secondly, every athlete has individual differences.  Obviously, positional demands need to be considered.  Should pitchers be trained like outfielders?  We also need to consider an individual’s unique training history, his experience with structured strength programs, injuries he has suffered, and any joint/muscle/movement issues he may be having at the present moment.

An online training program can be baseball-specific, but it will have a tough time addressing your individual needs as it is built for the baseball masses.  This is where you need to do your own research and find what works best for you.

If the idea of more searching and reading has you feeling overwhelmed and you want all the guesswork taken out, then we’ll point you toward four of the better programs currently out there.  If you want a more comprehensive list of baseball training programs, then check out the Resource Page.

Real Deal Baseball TrainingReal Deal Baseball Training

Real Deal Baseball Training is a 4-month baseball training program from Dan Huff and Joe Meglio.  It is designed with the baseball player in mind and is an off-season program.  The program is set up so that the athlete trains 4 days per week and uses a system of progressive loading followed by a one week deload.  Each of the four months in the program follows this cycle.  The program itself is laid out in an easy to follow manner and it has an extensive video library of each exercise or movement.

3X Pitching3X Pitching

3X Pitching is a pitcher specific program and is a very extensive velocity program from Brent Pourciau.  There’s quite a bit of value to it – a 16 week program that includes medicine ball work, Olympic lifts, and other velocity drills. You also get direct access to Brent himself with one-on-one email coaching, monthly phone calls, and a pitching mechanics video analysis. If you are a pitcher struggling to add velocity to your fastball, then this program is definitely worth looking in to.

Show and Go TrainingShow and Go Training

Show and Go is not a baseball specific program. However, the creator of Show and Go is Eric Cressey, who consistently works with high school, college, and professional baseball players. Show and Go is a 4 phase, 16-week program designed to increase your strength while keeping and increasing your mobility – exactly what every ballplayer needs. The program is flexible in that you pick how often you want to train with options for a 2, 3, or 4-day per week program. Show and Go also has an extensive video library of every exercise and movement.  This program would be great for the older high school ballplayer or older.  Plan on performing the 3 or 4-day program during your off-season and omit or substitute other exercises for any overhead lifts.

Starting StrengthStarting Strength

If you are an absolute novice, then Starting Strength is where you may want to begin.  However, it is not an online program.  It is a book.  Written by strength and Olympic weight lifting coach Mark Rippetoe, this program is great for novice lifters looking to learn the basic barbell lifts.  It can help you build a foundation of strength before trying any of the programs listed above.  Actually, even if you don’t want to follow this program, you should still buy the book and have it as a reference for your entire career.  It’s that good!

Each of the programs described above will definitely get you stronger and help you develop more power for the baseball field.  Remember, no program is perfect.  But some programs are better than others.  And, you still have to put in the hard work and effort to see results.  If you don’t have access to a good strength and conditioning coach, then you may want to consider one of the programs listed above.

Use the comments below and let us know if you have tried any of these programs.  Or, is there another option we’ve missed?

Good luck in your training!

Baseball Off-Season Workout

Sample Baseball Off-Season Workout

The off-season is the best time of year for baseball players to focus on their strength and conditioning. Before beginning any program, you should make sure you define your goals and have a clear focus as to what you want to accomplish. Some general goals to keep in mind for the off-season should be to recover from the previous season, rehabilitate existing/nagging injuries, and develop a strength and conditioning foundation for the following training year.

As discussed before, the training year can be broken down into off-season, pre-season, and in-season segments. Within each season, you can break down the different months into 4 week phases.

High School Baseball Strength Training

Baseball Strength Training Phases

For the purposes of this post, we will create an example baseball strength program for Phase 1 of the off-season. For this phase, our goals will be, but are not limited to:

  • Begin recovery work from the prior season.
  • If needed, rehabilitate any existing injuries.
  • Start a strength program that builds general strength and allows us to create a foundation upon which to build further in later phases of the training year.
  • Give the arm a break from throwing. Do not pick up a baseball.

Now, there is no official “start date” to the off-season. Each athlete will begin his individual program at some point after the previous season ends. Many coaches will advise to take off 2-4 weeks from everything, but you will have to make that call for yourself. If you are otherwise healthy and not feeling overly fatigued, you should start your off-season strength program sooner than later.

Off-Season Baseball Strength Program – Overview

Each training day will include the following segments, and each segment will be done in the order listed:

  • Foam Roll/Soft Tissue Work
  • Pre-hab
  • Dynamic Warm-up
  • Strength Work
  • Conditioning
  • Post-Training Session Static Stretching
  • Foam Roll

For the purposes of this article, a 3-day per week program will be considered.  A baseball off-season strength program can be 2-5 days depending on the individual and how the program itself is structured.  Before we dive right into the exercises and movements, let’s take a moment to discuss soft tissue work, pre-hab, and a dynamic warm-up.  These aspects of a baseball strength program are often overlooked or very poorly executed.  So, let’s take a quick look at these first three training methods.

Foam Roll/Soft Tissue Work

Foam Rolling for BaseballSoft tissue work is often the missing piece in many athletes’ training programs.  Ideally, every athlete would have a manual therapist or massage therapist that they could see on a regular basis to help with sore muscles, injuries, and overall recovery.  Unfortunately, these services often cost more than most young athletes and their parents can afford.  So, we look toward a more economical approach – the foam roller.  The technique is simple – apply pressure to sore muscles by placing your bodyweight through the foam roller.  Prior to a training session, foam rolling can help decrease muscle “tightness” and contribute to a better warm-up. Foam rolling after a training session can help muscles begin recovery from exercise.  So in the example program below, you will see foam rolling listed at the beginning and end of each training day.  If you do not have a foam roller, we strongly suggest you pick one up and make it a part of your training routine.  You can pick one up on Amazon for a very reasonable price.  We like this one.

Pre-hab

Many coaches and young athletes have never heard the term “pre-hab.”  If rehab is what you do after an injury, pre-hab is what you do to protect against injury.  Now, injury prevention is never 100%.  But, by incorporating pre-hab exercises in your training program, you can work on ironing out muscle imbalances caused by repetitive movements and hopefully decrease the chance of injury.  For baseball players, pre-hab work is most often focused on the shoulders, hips, thoracic spine, and core.  As a ballplayer, you want stability through your shoulders and core, while having stability and mobility through your hips and thoracic spine.  Pre-hab exercises work on these areas.  When designing a strength program, pre-hab movements can be inserted almost anywhere within a given workout.  However, placing them near the beginning of a training session can also serve to activate, or “wake up,” those areas of the body and prime them for the upcoming training session.

Dynamic Warm-up

Let’s cut straight to the point regarding a good warm-up.  Static stretching should be saved for post-activity and dynamic stretching should be done prior to activity.  This not only applies to training sessions, but practices and games as well.  Dynamic stretching movements stretch a muscle for 4-6 seconds and follow that stretch by a contraction (or shortening) of that muscle.  Static stretching involves a slow, controlled movement that has the athlete hold a stretch for an extended time of 30-60 seconds.  Looking at it another way, the goal of static stretching is to relax your muscles while the goal of dynamic stretching is to wake them up.  You definitely want active muscles when training or playing.  Using a dynamic warm-up will also increase your body temperature, heart rate, and blood flow to your muscles.  Your long-term mobility and flexibility will improve too.

Now that we have covered these areas of a training program, let’s take a look at this sample 3-day baseball training program.

Sample Off-Season Baseball Strength Program – Phase 1

When starting your off-season program, be sure to train on non-consecutive days.  You’ll want to give your body 36-48 hours to recover between training sessions.  While the examples below will include conditioning on the same days as lifting, you could perform your baseball conditioning on non-lifting days.  For example, if you strength train on Mon/Wed/Fri, you can perform you conditioning after your lifting session on those same days or on Tues/Thurs/Sat.  If you decide to complete your lifting and conditioning on opposite days, be sure to have at least one day per week that is devoted completely to recovery.  In this example, that would be Sunday.  That means no strenuous activity.  Either take the entire day off or focus just on soft tissue work and static stretching.

**We understand that you may not be familiar with many of the exercises listed below.  A quick search will direct you to videos and explanations that can help you better understand the movements.  However, just watching a video will not take the place of a qualified strength and conditioning coach who can demonstrate technique and properly correct form if there are any issues.  When in doubt, do not perform the movement.  Seek guidance and instruction.  If any exercise causes pain, use common sense and do not do it.**

Day 1

Foam Roll

  • Glutes – 1 x 60 seconds each side
  • IT Band – 1 x 60 seconds each side
  • Quads – 1 x 60 seconds each side
  • Groin – 1 x 60 seconds each side
  • Hip Flexor/TFL – 1 x 60 seconds each side
  • Mid/Upper Back – 1 x 60 seconds each side

This is a good starting point for foam rolling.  However, be sure to listen to your body.  It will tell you if certain areas need more or less focus.  You can always spend longer on one area if need be.

Pre-hab

Perform the following movements in a circuit by completing one set of each exercise and then return to the start and complete any movements with additional sets.

  • Glute Bridge Hold – 2 x 20 seconds
  • Lateral Band Walk – 1 x 10 steps each direction
  • Quadruped Rotations – 2 x 6 each side
  • I’s, Y’s, T’s, External Rotation with band – 2 x 10 each
  • Plank – 1 x 45 seconds

Dynamic Warm-up

The following should take 10-12 minutes to complete.  Set up two cones 10-15 yards.  Start on one cone and move in the direction of the second.  When you complete the required distance for a movement, jog back to the starting cone.  Complete each movement deliberately.  Do not just go through the motions.

  • Reverse Lunge with Twist – 1 x 10 yards
  • Inverted Hamstring Stretch – 1 x 10 yards
  • World’s Greatest Stretch – 1 x 10 yards
  • Inch Worms – 1 x 10 yards
  • Straight Leg March – 1 x 10 yards
  • High Knees – 1 x 10 yards
  • Butt Kicks – 1 x 10 yards
  • Lateral Shuffle – 1 x 10 yards each direction

Strength

Exercises listed below are paired in supersets.  Training in supersets means that you will perform one set of the first listed exercise and then one set of the second listed exercise.  Take 45-60 seconds of rest and then repeat for the second set of each.  Continue this method until all sets in a given superset are completed.  Then, move to the next two exercises that are paired together as a superset.

  • Box Jump – 4 x 5
  • Medicine Ball Rotational Throw – 4 x 5 each side
  • Trap Bar Deadlift – 3 x 5
  • DB Bench Press – 3 x 6
  • DB Reverse Lunge – 3 x 6 each
  • Inverted Row – 3 x 10
  • Stability Ball Hamstring Curl – 2 x 12
  • Scapular Wall Slide – 2 x 12
  • Cable Pallof Press Hold – 2 x 10 seconds each side
  • Prone Low Back – 2 x 10

Conditioning

Short Pick-ups – You’ll will need a partner and two baseballs.  Have your partner start with both baseballs and setup roughly 5-7 yards apart.  Start by moving laterally as your partner rolls you a ground ball.  Field the short groundball and toss back to your partner as you begin moving back in the direction from where you started.  Your partner should already have started rolling you the second ball.  Repeat for prescribed number of reps.

  • 4 x 20 pick-ups; rest 1-2 minutes between sets

Static Stretching

  • Hamstrings – 1 x 60 seconds each
  • Groin – 1 x 60 seconds each
  • Piriformis Stretch – 1 x 60 seconds each
  • Hip Flexor Stretch – 1 x 60 seconds each
  • Calves – 1 x 60 seconds each

Foam Roll

  • Glutes – 1 x 60 seconds each side
  • IT Band – 1 x 60 seconds each side
  • Quads – 1 x 60 seconds each side
  • Groin – 1 x 60 seconds each side
  • Hip Flexor/TFL – 1 x 60 seconds each side
  • Mid/Upper Back – 1 x 60 seconds each side

Day 2

Foam Roll

  • Glutes – 1 x 60 seconds each side
  • IT Band – 1 x 60 seconds each side
  • Quads – 1 x 60 seconds each side
  • Groin – 1 x 60 seconds each side
  • Hip Flexor/TFL – 1 x 60 seconds each side
  • Mid/Upper Back – 1 x 60 seconds each side

Pre-hab

Perform the following movements in a circuit by completing one set of each exercise and then return to the start and complete any movements with additional sets.

  • 1-leg Glute Bridge Hold – 2 x 10 seconds each side
  • Quadruped Hip Abduction- 2 x 12 each side
  • 90/90 Stretch – 2 x 6 each side
  • Rhythmic Stabilizations – 2 x 10 seconds each arm
  • Side Plank – 1 x 30 seconds each side

Dynamic Warm-up

The following should take 10-12 minutes to complete.  Set up two cones 10-15 yards.  Start on one cone and move in the direction of the second.  When you complete the required distance for a movement, jog back to the starting cone.  Complete each movement deliberately.  Do not just go through the motions.

  • Walking Lunge with Knee Hug – 1 x 10 yards
  • Walking Quad Stretch – 1 x 10 yards
  • World’s Greatest Stretch – 1 x 10 yards
  • Inch Worms – 1 x 10 yards
  • Lateral Lunge – 1 x 10 yards each direction
  • High Knees – 1 x 10 yards
  • Butt Kicks – 1 x 10 yards
  • A Skip – 1 x 10 yards
  • Lateral Shuffle – 1 x 10 yards each direction

Strength

As with Day 1, exercises below are listed as supersets.  In one instance, you will see a tri-set.  Tri-sets are performed similar to supersets, but instead of two exercises back-to-back, you now have three.

  • Lateral Bound- 4 x 3 each direction
  • Medicine Ball Slam – 4 x 6
  • Forearm Wall Slide – 3 x 8
  • Box Squat – 3 x 5
  • 1-arm Medicine Ball Push-up – 3 x 6 each side
  • Half-Kneeling Hip Flexor Stretch – 2 x 60 seconds each side
  • DB RDL – 3 x 6
  • Cable Row – 3 x 10
  • DB Goblet Lateral Squat – 3 x 8 each side
  • TRX W’s – 2 x 10
  • Stability Ball Plank Rollout – 2 x 10
  • Stability Ball Reverse Hyper – 2 x 10

Conditioning

Build-up Sprints – Build-up sprints start with the baseball player already in motion. In the example below, you will run a total of 40 yards, but only the second 20 yards at 100% effort. Set up cones, use a track, or perform in the outfield. Set up cones at 20 and 40 yards.  When you perform the Build-Up sprints, begin your run at 50-75% effort. As you hit the halfway mark, increase your speed to 100% effort.

  • 2 20-yard sprints at 50% effort
  • 8 40-yard Build-Up sprints: first 20 yards at 75% effort, second 20 yards at 100% effort

After each sprint, use your walk back to the starting line as your rest.

Static Stretching

  • Hamstrings – 1 x 60 seconds each
  • Groin – 1 x 60 seconds each
  • Piriformis Stretch – 1 x 60 seconds each
  • Hip Flexor Stretch – 1 x 60 seconds each
  • Calves – 1 x 60 seconds each

Foam Roll

  • Glutes – 1 x 60 seconds each side
  • IT Band – 1 x 60 seconds each side
  • Quads – 1 x 60 seconds each side
  • Groin – 1 x 60 seconds each side
  • Hip Flexor/TFL – 1 x 60 seconds each side
  • Mid/Upper Back – 1 x 60 seconds each side

Day 3

Foam Roll

  • Glutes – 1 x 60 seconds each side
  • IT Band – 1 x 60 seconds each side
  • Quads – 1 x 60 seconds each side
  • Groin – 1 x 60 seconds each side
  • Hip Flexor/TFL – 1 x 60 seconds each side
  • Mid/Upper Back – 1 x 60 seconds each side

Pre-hab

Perform the following movements in a circuit by completing one set of each exercise and then return to the start and complete any movements with additional sets.

  • Glute Bridge – 2 x 15
  • Lateral Squat – 1 x 10 each
  • Standing Rotations – 2 x 6 each side
  • Prone W’s – 2 x 12
  • Supermans – 1 x 12

Dynamic Warm-up

The following should take 10-12 minutes to complete.  Set up two cones 10-15 yards.  Start on one cone and move in the direction of the second.  When you complete the required distance for a movement, jog back to the starting cone.  Complete each movement deliberately.  Do not just go through the motions.

  • Reverse Lunge with Twist- 1 x 10 yards
  • Quad Stretch with Toe Touch – 1 x 10 yards
  • World’s Greatest Stretch – 1 x 10 yards
  • Inch Worms – 1 x 10 yards
  • Straight Leg March – 1 x 10 yards
  • High Knees – 1 x 10 yards
  • Butt Kicks – 1 x 10 yards
  • A Skip – 1 x 10 yards
  • Lateral Shuffle – 1 x 10 yards each direction

Strength

Again, supersets and tri-sets are utilized similar to Day 2.  The final two exercises/movements are listed by by themselves and not together.  For the second to last movment, perform the first set, rest for 30-60 seconds, then repeat for the second set.  Then, move to the final exercise and perform in the same manner.

  • Broad Jump – 4 x 5
  • Split Stance Medicine Ball Overhead Throw – 4 x 3 each leg in front
  • Rhythmic Stabilization – 2 x 10 seconds each side
  • BB Glute Bridge – 3 x 8
  • TRX Push-up – 3 x 10
  • 1-leg DB RDL – 3 x 6 each side
  • Chin-up – 1 x 10, 1 x 8, 1 x 6
  • Side Plank Rotation – 2 x 12 each side
  • Body Saw – 2 x 12

Conditioning

  • Heavy Sled Pushes – 6 x 30 yards; rest to full recovery between sets (at least 1-2 minutes, longer if needed)

Static Stretching

  • Hamstrings – 1 x 60 seconds each
  • Groin – 1 x 60 seconds each
  • Piriformis Stretch – 1 x 60 seconds each
  • Hip Flexor Stretch – 1 x 60 seconds each
  • Calves – 1 x 60 seconds each

Foam Roll

  • Glutes – 1 x 60 seconds each side
  • IT Band – 1 x 60 seconds each side
  • Quads – 1 x 60 seconds each side
  • Groin – 1 x 60 seconds each side
  • Hip Flexor/TFL – 1 x 60 seconds each side
  • Mid/Upper Back – 1 x 60 seconds each side

Week by Week Progressions

Remember, Phase 1 is one month in duration – 4 weeks.  Each week you should be making small adjustments to each exercise so as to change the sets, reps, or weight.  Here are some quick guidelines to help you make those progressions.

  • Power-based exercises such as jumps, bounds, and medicine ball throws should be adjusted minimally.  Add one rep in Week 2, another in Week 3.  For Week 4, return to the same rep scheme as Week 1.
  • The deadlift and box squat can be kept at 3 sets of 5 reps each week.  Add 5 pounds each week to each lift.
  • For exercises involving dumbbells (DB) or cables, increase 6 reps to 8, and 8 reps to 10.  Keep the weight the same when making these rep increases.  After completing a week at 10 reps, return to 6 reps for the exercise, but increase the weight.
  • For bodyweight exercises such as those that use the TRX or no equipment at all, follow a similar method using 8, 10, and 12 as your rep increments.

Final Words

The program outlined above should give you a fantastic starting ground to begin your off-season baseball strength program.  Phase 1 will allow you to work on the basics, iron out some inefficiencies in your movement patterns, and create a foundation upon which to build even more strength, mobility, and stability.

If you have any questions, feel free to contact us using the contact page on the menu above.

Good luck!

Baseball Conditioning

3 Baseball Conditioning Drills Better than Running Poles

Baseball Conditioning

There is still a strong trend among coaches today to stick with long distance running as a form of baseball conditioning. Whether running poles on the warning track, or testing the useless 2-mile time, baseball coaches still believe that their players need an aerobic base to make it through nine innings of baseball.

However, if we really look at the game, we can see that baseball is a power and sprint-based sport. The action on the field occurs quickly, with bursts of acceleration and top speed followed by longer periods of rest. So when considering baseball conditioning, coaches should try to mimic the demands of the sport. Running poles or other long distances does not properly address the needs of the ballplayer. In a long distance run, an athlete will use moderate intensity over a long duration, thereby training his body to operate at a slower pace. The human body is very efficient at adapting to the stimuli placed upon it. So we have to be aware what we are asking the body to do. Do we want it to execute tasks slowly or quickly on the baseball field?

If you want to be quick and explosive, your conditioning needs to involve sprint work, sled pushes, medicine ball circuits, and other power-based movements. The amount of rest taken between various bouts is important too. In a sport where you can achieve nearly full recovery before you make another pitch, take another swing, or advance to the next base, you should be taking nearly full rest between sprints or other conditioning sets.

Here are 3 sample baseball conditioning routines better than running poles. First, complete a solid dynamic warm-up, or do these routines at the end of a good practice.

Build-Up Sprints or Flying Starts

Build-up sprints (or Flying Starts) begin with the baseball player already in motion. In the example below, you will run a total of 60 yards, but only the second 30 yards at 100% effort. Use the foul line as your starting point. Set up cones at 30 and 60 yards.  First, perform a couple of light sprints at the end of your dynamic warm-up. When you perform the Build-Up sprints, begin your run at 50 to 75% effort. As you hit the halfway mark, increase your speed to 100% effort.

  • 2 30-yard sprints at 50% effort
  • 8 60-yard Build-Up sprints: first 30 yards at 75% effort, second 30 yards at 100% effort

After each sprint, use your walk back to the starting line as your rest.

Shuttle Runs

Shuttle runs allow you to work on your ability to start and stop and your ability to quickly change direction. Set up two cones anywhere from 10 to 20 yards apart. Begin at the first cone and sprint full speed to the second cone. Slow down, plant your foot and change direction, then sprint back to the start. You complete one rep by performing the total assigned distance between the cones. Here’s a good series where the total distance may is similar from rep to rep, but the distance between the cones varies, allowing for more or less change of direction.

  • 2 x 30 yards – cones 10 yards apart
  • 2 x 60 yards – cones 15 yards apart
  • 2 x 60 yards – cones 20 yards apart
  • 2 x 60 yards – cones 10 yards apart

Rest one to two minutes between sets.

Sled Pushes

Sled pushes are great for working on leg drive. You can load the sled with heavy weight to work more on your leg strength or you can go lighter to focus more on speed. Either way, sled pushes are a challenge.  Depending on your current level of conditioning, shoot for three to six sets of 20-30 yards per push.

Baseball Strength Training 101

Baseball Weight Training

Baseball is a unique sport with very specific physical demands placed upon each athlete who takes the field. Why is it then, that so many players, coaches, and parents are lost when it comes to baseball strength training?

Anyone who has been in the game long enough knows that baseball players need to be strong, fast, powerful, flexible, and durable. The best way to develop these attributes is to incorporate a year round strength and conditioning program.

There Is No Perfect Baseball Training Program

Many players and coaches are searching for the perfect training program. Unfortunately, you cannot find one. Every athlete has different needs based on sport, position, and basic individual differences. This is very important for baseball players and coaches to understand – no two players are the same.

However, there are some basics that every baseball strength and conditioning program should include:

  • Pre-hab work focusing on shoulder, hip, and back mobility and strengthening
  • Soft Tissue Work
  • Dynamic Warm-up
  • Power-based movements that include plyometrics and medicine balls
  • Basic strength movements such as the deadlift and squat
  • Rotational and Anti-rotational movements
  • Baseball Specific Conditioning
  • Flexibility Work

Again, these are basic foundations that you should look for in any baseball training program.

That being said, baseball players cannot expect to get in “baseball shape” and stay in shape by just playing the game. There needs to be consistent effort day in and day out. Off-season, pre-season, and in-season baseball training programs need to be implemented for maximum results.

Let’s take a look at what a an entire year looks like at the high school, college, and professional levels.

High School Baseball Strength Training

College Baseball Strength Training

As you can see, the high school and college seasonal breakdowns are roughly the same.

While college baseball has a uniform start date, the actual collegiate season could end in May or June depending on a team’s post-season success.  However, most college ballplayers continue playing through the summer in collegiate summer leagues throughout the country. So, we’ll consider “summer ball” as in-season.  The same goes for high school.

Pro Baseball Strength Training

When we look at professional baseball, again, we have a uniform start date at the beginning of April and depending on the post-season chances of a given team, the season could end in September or October.  Granted, MLB playoffs have been extended and now end in November.  However, a majority of players making their way through the minor leagues will finish their respective seasons in September.  As for the professional pre-season, this is just noted by the beginning of Spring Training when pitchers and catchers report in mid-February.

Designing A Baseball Strength Training Program

Baseball Mobility

Looking at the charts above, we can see that there are three distinct training periods throughout the year. Based on what time of year it is, baseball players and coaches can design strength training programs accordingly.

The entire year should be set up in a periodized fashion that works toward consistency for the athlete while also allowing for variations to be made to exercise selection, sets, reps, and weight. Consistency is key in allowing the body to adapt to the training stresses placed upon it. Variation is important so as to keep challenging the body. If it does not challenge you, it does not change you.

Training Phases

To keep it simple, we can breakdown each “season” into its various months, where each month is a new phase of 4-5 weeks.

Baseball Strength Training Phases

Off-Season

Overall goals — Recover from previous season, rehabilitate existing/nagging injuries, develop a strength and conditioning foundation for the following training year

  • Phase 1 — Begin recovery work from the season that just ended. If needed, rehabilitate existing injuries.  Begin a general strength program.  Do not pick up a baseball – give the arm a break from throwing.
  • Phase 2 — Continue rehabilitation of any lingering injuries.  Evaluate Phase 1 and make necessary changes to general strength program. Begin adding some medicine ball work and plyometrics.  If all injuries are gone, begin baseball-specific conditioning work. Soft tissue and flexibility work needs to be consistent.  Continue to hold off on any throwing.
  • Phase 3 — Unless injuries were season-ending, any nagging issues should begin to fade by Phase 3 (month 3).  Again, evaluate the previous phase and edit/progress the program as necessary.  Volume of power-based movements such as medicine ball work and plyometrics should increase.  Certain precautions should be considered for any overhead lifting and heavy upper body work.  Upper body pulling exercises should balance out pushing exercises.  Depending on the individual, some pushing exercises could be eliminated.  Soft tissue and flexibility work needs to be consistent.  Outside of the weight room, throwing should begin near the middle to end of the month, and a long toss program should start to be implemented.  Throwing can still be put on hold until Phase 4 as well.
  • Phase 4 — As the off-season comes into its final phase, the ballplayer should really be clicking on all cylinders now.  Lots of medicine ball work.  Volume of plyometrics can remain similar to the previous phase.  Deadlift and squat variations should be a staple in the program by now.  Continue to strengthen the back with pulling exercises.  Bench press variations are okay, but depending on the individual it may be better to consider push-up variations that place less strain on the throwing shoulder.  If you have not yet started a throwing program, now is the time to pick the ball and glove up again. Any throwing program should have the ballplayer throwing 3-5 times per week by the end of the off-season. That’s right, continue your soft tissue work.  Your body will thank you for it later.

Pre-Season

Overall goals — Improve upon strength and conditioning foundation gained in off-season phase, develop more baseball-specific speed, strength, and power

  • Phase 1 — We really want to convert all that strength gained in the Off-Season phases to power.  As the number of on-field practices increases, along with the athlete’s throwing program, we need to be smart about increasing power-based movements and baseball-specific conditioning such as sprints, sled work, shuttle runs, and medicine ball work. Continue to lift heavy with your bigger movements of deadlifts and squats.  Soft tissue work and flexibility training will be your keys to recovery.
  • Phase 2 — Evaluate pre-season Phase 1 and make the necessary adjustments.  There’s no need to get cute now or make any big changes.  A few eliminations/additions of certain movements and exercises are all you need here.  The season is only about 6 weeks away now.
  • Phase 3 — Typically a shorter phase of 2-3 weeks depending on when your actual season begins.  But like Phase 2, just make a few adjustments and get ready to begin the season with an explosive start.  Some coaches would suggest a de-load week prior to Opening Day to make sure the body is well rested and ready to go.

In-Season

Overall goals — Maintain strength, speed, and power from off-season and pre-season phases, maintain flexibility, maximize recovery between practices and games

  • Phase 1 — As the season has just begun, we usually take the beginning of the baseball in-season training program a bit lighter in terms of volume so the ballplayer can adjust to the addition of games to his schedule.  As we get in to weeks 2 and 3 of this phase, we can increase a few exercises to 2 or even 3 sets.  Again, it’s all dependent on the ballplayer and his individual needs.  Medicine ball, jumping, and other power-based movements can continue to be performed although at a much lower volume.  The fact that the athlete is now playing his sport should provide plenty of on-field movements aimed at quickness and speed.  Mobility drills, flexibility work, and foam rolling should be an everyday habit.
  • Phase 2-3 —  As we approach the middle half of the season, the athlete really needs to evaluate his particular needs.  Are his strength levels staying consistent?  Is he picking up nagging bumps, bruises, or injuries?  Is he better suited to limit his strength training volume and focus on his recovery methods, or can he still work in a strength exercise or two?  Whatever is designed must be easily adaptable to the athlete’s changing needs as the season wears on.
  • Phase 4-6 — Similar to Phases 2-3.  Take an individual approach.  Things that should be considered are whether or not you are in post-season play, your injury status, and whether or not  you a regular starter or come off the bench.  Be smart and finish the season on a high note.

With a structured plan for each phase, baseball players and coaches can focus their attention on the goals of a particular phase. Each phase should also plan recovery or de-load periods to give the body a chance to rest, repair, and become stronger. These rest periods can come between exercises during a specific training session, between training sessions during a training week, or even between training phases.

How Often Should Baseball Players Strength Train?

As discussed before, every athlete needs to determine his own recipe for success. Some ballplayers need to be in the gym four days a week. Others can accomplish their work in a three day per week program.

Furthermore, it may depend on the time of year. An in-season program may call for only one or two training sessions per week, where an off-season program can be four or five days per week.

Other considerations should include the number of baseball practices and games in a given week, whether or not the ballplayer is in-season for another sport, and if there are any injuries from which the athlete is recovering.

A Word on Baseball Nutrition

Baseball players can have the best structured training program and achieve results by staying consistent, however, they can still be limited by their nutrition plan or lack thereof.

Baseball Nutrition
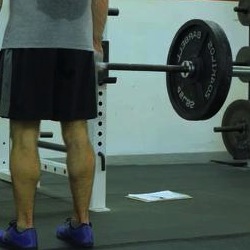
Many ballplayers, coaches, and parents do not have the slightest clue when it comes to eating for performance. Again, there is no secret formula here, and every athlete will have to assess his own nutritional needs to find out what works best for him. But, here are some basic guidelines that every baseball player should consider when looking at a baseball nutrition game plan.

  • Begin everyday with breakfast.
  • Take a multivitamin.
  • Smaller, more frequent meals throughout the day is a better approach than having just three meals a day.
  • Include a protein source with every meal. The leaner the better.
  • Stay hydrated by drinking water. Watch out for empty calories in juices and sports drinks.
  • Grab a protein shake or bar after a strength training session in order to get rapidly absorbing nutrients into the body.

Baseball Training Methods

All of the information above can serve as a basic guideline to help you in your pursuit of performance excellence.  However, this is just the beginning of learning how to train for baseball.  Be sure to check out the Baseball Training Methods blog for more detailed articles regarding baseball strength and conditioning.  The resource page is a fantastic source if you are looking for a particular program, a piece of training equipment, or other useful information.

Best wishes and good luck!